The Ankle Lab

Ankle Injury Prevention & Rehab

Bosu Ball

Managing Pain And Regaining Movement After An Ankle Injury

Ankle sprains are common—you twist it, rest for a week or two, and expect to bounce back to normal. But what happens when the pain, stiffness, and limited movement stick around long after you thought you’d recovered? If this sounds familiar, you’re not alone.

Let’s get into why discomfort can persist after an ankle injury and explore evidence-based strategies to help you recover fully and regain your mobility.


Why Pain and Stiffness Linger

Ankle injuries are more than skin-deep. They often damage ligaments, the tough bands of tissue that hold your bones together and provide stability. While the initial goal of recovery is to manage pain and inflammation, what happens beneath the surface is often more complicated than it seems.

1. Scar Tissue Formation

When ligaments tear, the body repairs them by forming scar tissue. Unfortunately, this new tissue isn’t as flexible or functional as the original, often leading to stiffness and restricted movement. Adhesions (when scar tissue binds where it shouldn’t) can make matters worse, creating discomfort and further limiting mobility.

2. Improper Healing

Without the right rehab, ligaments may not heal properly, resulting in chronic ankle instability. This leaves the ankle weaker, more prone to re-injury, and a constant source of pain and frustration.

3. Nerve Sensitivity

Sometimes, the lingering pain isn’t about the tissue at all. When you injure your ankle, the nerves in the area can become hypersensitive, sending pain signals long after the physical damage has healed. If this isn’t managed correctly, discomfort can persist even when everything else looks fine.


How to Tackle Post-Injury Swelling and Pain

Even if your injury is months old, managing swelling and pain effectively can make a big difference in how you feel.

1. Ice and Elevation

Simple but effective, icing reduces inflammation and provides pain relief. Apply ice for 15-20 minutes at a time, several times a day, and pair it with elevating your ankle above heart level. These techniques are helpful not only during the initial injury phase but also for recurring swelling triggered by activity.

2. Compression and Bracing

Feeling unstable or sore after activity? A compression wrap or brace can give your ankle the support it needs. While helpful in the short term, avoid relying on braces too much—they’re a tool, not a solution. Long-term stability comes from strengthening the joint.

3. Gentle Movement

Too much rest can lead to stiffness. Incorporate gentle movements like ankle pumps (pointing and flexing your foot) or alphabet exercises (tracing the alphabet with your toes) to keep the joint active without aggravating it. These movements boost blood flow and help maintain mobility.


The Role of Strengthening and Mobility Work

Addressing pain and stiffness after an injury isn’t just about resting—it’s about rebuilding strength and restoring mobility. Neglecting this part of recovery is one of the biggest reasons discomfort persists.

1. Balance and Proprioception

Your body’s ability to sense where it is in space—called proprioception—can be thrown off by an ankle injury. Rebuild this critical function by practicing balance exercises, like standing on one leg or balancing on a foam pad. Gradually increasing the challenge restores your stability and prevents future injuries.

2. Stretching and Range of Motion

Tight calves and a stiff Achilles tendon can limit ankle movement. Incorporate stretches that gently lengthen these areas, like calf stretches or resistance band exercises, to improve flexibility without overloading the joint.

3. Gradual Progression

Progress is a marathon, not a sprint. Overdoing it can lead to setbacks, so listen to your body and advance slowly. Sharp pain or significant discomfort is your cue to dial it back. Consistency and patience are your best tools for achieving long-term recovery.


When to Seek Professional Help

Sometimes, no amount of self-guided rehab will do the trick. If your pain, swelling, or instability lingers beyond a few weeks, it’s time to call in a professional.

Athletic Trainer

An athletic trainer can design a personalized plan to strengthen weak areas and improve mobility. Their expertise can address issues like chronic instability and help you avoid future injuries.

Advanced Imaging

If the pain persists despite rehab, an MRI can reveal hidden problems like scar tissue impingement or ligament tears that may require surgical intervention.

Warning Signs of CRPS

In rare cases, persistent pain could indicate complex regional pain syndrome (CRPS), a condition causing severe sensitivity and chronic discomfort. Symptoms like extreme pain, temperature changes, or hypersensitivity warrant immediate medical attention.


Conclusion

Recovering from an ankle injury isn’t always straightforward. Lingering pain and stiffness often have underlying causes, from scar tissue to improper healing or nerve sensitivity. The good news? With the right approach—gentle movement, strengthening exercises, and, when needed, professional help—you can overcome these challenges and return to full mobility.

Your recovery takes time and effort, but the payoff is worth it: a stronger, more stable ankle and the confidence to move freely without fear of re-injury. Listen to your body, stay patient, and remember—you’ve got this.

Dr. T

Ankle Injury Orange Shoes

The Twist: Recognizing When an Ankle Sprain Needs Extra Attention

Ankle sprains happen all the time—whether it’s a misstep on uneven ground, a bad landing during a workout, or a sudden twist during a game. But here’s the thing: not all ankle sprains are created equal. While some heal with rest and care, others could be hiding something more serious, like ligament tears or fractures. Knowing when to dig deeper and seek medical attention can make all the difference in your recovery.

Let’s dive into the signs that your sprain might be more than “just a sprain,” the limits of X-rays, and how the PEACE & LOVE approach can set you on the path to full recovery.


When It’s More Than a Sprain: Red Flags to Watch For
1. Persistent Pain and Swelling

If your ankle is still swollen and painful days after the injury, it’s a big clue that something more serious might be going on. Mild sprains typically improve within a few days, so if your symptoms aren’t letting up—even with rest and compression—it could mean a ligament tear or even a fracture.

2. Trouble Bearing Weight

Can’t walk or put any weight on your ankle? That’s a red flag you shouldn’t ignore. While most sprains allow for some weight-bearing after the initial injury, being completely unable to walk or feeling like your ankle is “giving out” might indicate a more severe ligament injury or a fracture. It’s time to get it checked out.

3. Unusual Bruising

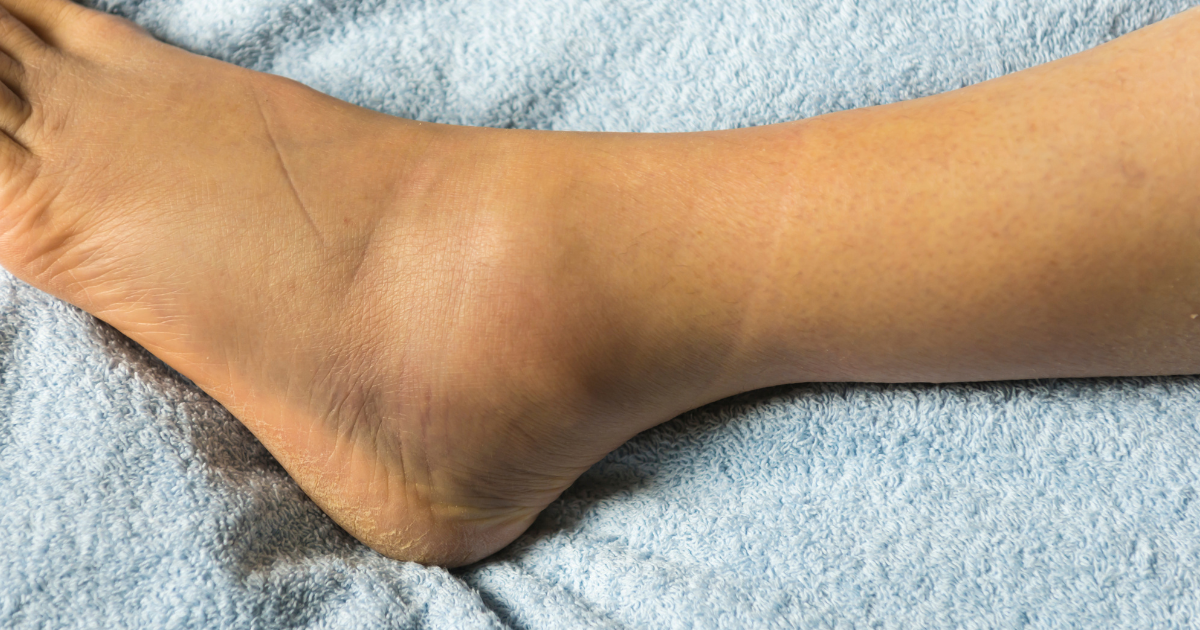
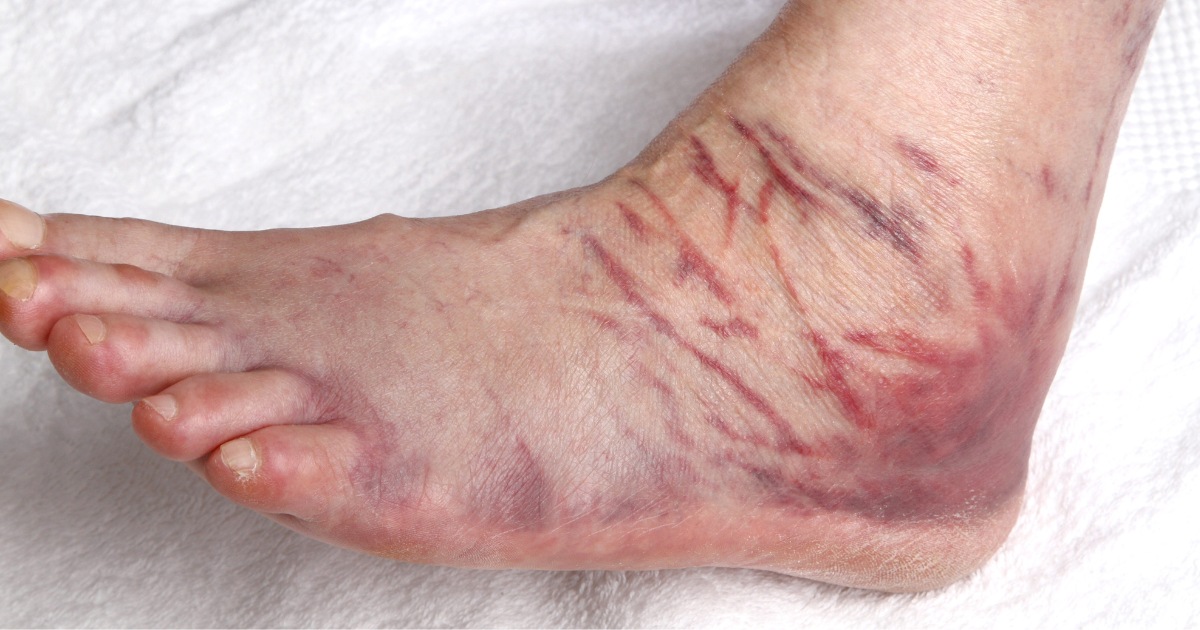
Bruising that shows up in unexpected areas, like the inside of your ankle, could signal a high ankle sprain or another more complex injury. High ankle sprains involve the ligaments that connect the lower leg bones (the tibia and fibula) and often need specialized treatment.

Key takeaway: If you’re dealing with lingering pain, difficulty walking, or unusual bruising, don’t wait. Seek medical advice to rule out complications and prevent long-term damage.


X-Rays Aren’t Always Enough: Why You Might Need an MRI
The Limits of X-rays

After an ankle injury, most doctors will start with an X-ray to check for fractures. While X-rays are great for spotting broken bones, they miss soft tissue injuries like ligament tears and cartilage damage. This means you could still be dealing with a significant injury even if your X-ray looks fine.

When to Push for an MRI

If your symptoms persist despite treatment—or if they’re getting worse—it’s time to consider an MRI. Unlike X-rays, MRIs give a clear picture of the soft tissues in your ankle, including ligaments, tendons, and cartilage. This information is crucial for creating an effective recovery plan.

Key takeaway: Don’t settle for an X-ray alone if your pain isn’t improving. An MRI can reveal hidden issues and help guide your recovery.


When to Call in the Experts
Orthopedic Specialist vs. Physical Therapist

If your ankle isn’t healing within the typical 1-2 week recovery window, it’s time to see a specialist. An orthopedic doctor can diagnose more complex issues and recommend treatments like bracing, physical therapy, or, in severe cases, surgery. A physical therapist can help you regain strength and mobility, ensuring a smooth recovery.

The Power of a Second Opinion

Don’t hesitate to get a second opinion if your recovery stalls. Another healthcare provider may catch something that was missed or offer new treatment options.

Key takeaway: Early intervention from a specialist can prevent long-term complications and get you back on your feet faster.


Taking Control with PEACE & LOVE

The PEACE & LOVE approach takes a modern spin on the classic RICE method, focusing on both short-term relief and long-term recovery. Here’s how it works:

PEACE (Immediate Care)
  • Protect: Avoid movements that increase pain or worsen the injury.
  • Elevate: Keep your ankle above heart level to reduce swelling.
  • Avoid Anti-Inflammatories: Skip NSAIDs in the early phase; inflammation is part of the healing process.
  • Compress: Use a wrap or brace for support.
  • Educate: Learn about your injury to make informed decisions.
LOVE (Rehabilitation Phase)
  • Load: Gradually reintroduce weight-bearing activities as pain allows.
  • Optimism: Stay positive—your mindset can speed up healing.
  • Vascularization: Boost blood flow with gentle movements.
  • Exercise: Focus on strengthening and improving ankle stability to prevent future injuries.

Key takeaway: The PEACE & LOVE approach isn’t just about managing symptoms—it’s about building a stronger, healthier foundation for your recovery.


Conclusion

Ankle sprains can be tricky. While many heal on their own, persistent pain, trouble bearing weight, or unusual bruising could mean there’s more to the story. Knowing when to push for advanced imaging like an MRI or seek help from a specialist can save you from long-term complications. And don’t forget to give your recovery the care it deserves with the holistic PEACE & LOVE approach.Your body knows how to heal—sometimes it just needs a little guidance. Stay patient, stay proactive, and take each step toward recovery with confidence.

Dr. T

Avoid These Mistakes: Critical Steps to Take Immediately After an Ankle Injury

What to Do Right After an Ankle Injury: Immediate Care Tips for Fast Recovery

A sudden twist, a missed step, or a mid-game misstep—ankle sprains can catch anyone off guard. The key to bouncing back quickly is knowing exactly what to do in those first hours and days after the injury. Whether you’re an athlete benched unexpectedly or someone navigating an unlucky tumble, the steps you take immediately can set the tone for your recovery.

Let’s break it down: from quick fixes like RICE to long-term strategies like PEACE & LOVE, here’s your go-to guide for tackling an ankle sprain head-on.


Step 1: Immediate Response – Why the First 24 Hours Matter

The first 24 hours after an ankle injury are make-or-break time. This is when your body’s inflammatory response kicks into high gear, causing swelling, pain, and sometimes a not-so-pretty bruise. While this reaction is normal (and even helpful), unmanaged inflammation can lead to complications like tissue damage or extended recovery times. That’s why what you do right away is so important.

Start by recognizing the signs: swelling, bruising, pain, and limited mobility. The goal in these early hours is simple: reduce swelling, manage pain, and protect the injury to prevent further damage. The quicker you take action, the smoother your recovery will be.


Step 2: RICE vs. PEACE & LOVE – Choosing Your Recovery Path

For years, RICE (Rest, Ice, Compression, Elevation) was the gold standard for ankle sprains—and it’s still a solid approach for initial care. But today, many experts are leaning into a more holistic recovery framework: PEACE & LOVE. This method doesn’t just stop at early care; it paves the way for a long-term recovery plan that helps you regain full strength.

Here’s how they compare:

RICE (Rest, Ice, Compression, Elevation)
  • Rest: Keep weight off your ankle to prevent further injury.
  • Ice: Apply ice for 15-20 minutes every couple of hours to reduce swelling.
  • Compression: Use a wrap or bandage for support and to manage swelling.
  • Elevation: Keep your ankle raised above heart level to minimize fluid buildup.
PEACE & LOVE
  • PEACE (Protect, Elevate, Avoid anti-inflammatory drugs, Compress, Educate):
    • Protect your ankle by avoiding weight-bearing activities.
    • Elevate to reduce swelling (hello, couch time!).
    • Avoid NSAIDs early on—let your body’s inflammation response do its healing magic.
    • Compress with a bandage for added support.
    • Educate yourself on recovery techniques.
  • LOVE (Load, Optimism, Vascularization, Exercise):
    • Gradually reintroduce movement to stimulate healing.
    • Stay optimistic—your mindset plays a big role in your recovery.
    • Encourage blood flow with light, pain-free movement.
    • Start exercises to rebuild strength and flexibility.

While RICE is a great place to start, PEACE & LOVE shifts the focus toward active recovery and long-term resilience.


Step 3: When to See a Doctor

Sometimes, a sprain needs more than at-home care. Here’s when to seek medical attention:

  • You can’t bear weight on your ankle at all.
  • Pain is intense and doesn’t ease after a few hours.
  • Swelling gets worse or doesn’t go down after 72 hours.
  • Discoloration or instability makes walking difficult.

Getting an X-ray or MRI can rule out serious issues like fractures or ligament tears, ensuring you’re on the right track for recovery.


Step 4: The Days After – Moving Toward Recovery

Once the initial pain and swelling subside, it’s time to ease back into movement. But don’t rush it—this phase is all about balance. Too much rest can lead to stiffness, while pushing too hard can result in setbacks.

Start with these steps:

  • Gentle Range-of-Motion Exercises: Move your ankle in all directions to keep it flexible.
  • Light Weight-Bearing: Use crutches or a walking boot if needed, but aim to wean off them as soon as it’s safe.
  • Strengthening: Begin simple exercises like towel scrunches, balancing on one foot, or resistance band work to rebuild stability.
  • Listen to Your Body: Sharp pain is your sign to slow down.

Gradually transitioning from rest to activity is critical for avoiding re-injury and building long-term strength.


Takeaway

An ankle sprain might feel like a major hurdle, but with the right care, you’ll be back on your feet in no time. Start strong with immediate care—whether you choose RICE or the more comprehensive PEACE & LOVE—and know when to call in a professional for help. Recovery is a process, but by taking it one step at a time, you’ll come back stronger than ever.

Stay proactive, stay patient, and above all, stay optimistic—your ankles have got this!

Dr. T

Sprained Left Ankle on Bed

Unlocking The Secrets Of Ankle Sprains: Discover The Healing Time!

Ankle sprains frequently occur due to sudden twists or rolls of the foot and ankle, stretching or tearing ligaments. They can happen to anyone, anytime, whether it’s from a misstep during a jog or a trip off a curb. After the initial shock and discomfort fade, many people wonder:

How long will it take for my ankle to heal?

What is an Ankle Sprain?

Before getting into healing times, let’s examine what occurs when you sprain your ankle. Ligaments, tough fibrous bands of tissue, connect bones within the joint and provide ankle stability. When these ligaments undergo excessive force, they can sustain injury, resulting in an ankle sprain. The severity varies from mild, involving slight ligament stretching, to severe, where the ligament tears completely.

The Healing Process

Healing an ankle sprain is a process that involves three main stages: inflammation, tissue repair, and remodeling. 

  • Inflammation sets in right after the injury, bringing swelling, pain, and redness as the body’s healing mechanisms kick into gear.
  • Tissue repair follows, as new collagen fibers are laid down to repair the damage.
  • Finally, remodeling takes place as the new tissue strengthens, gradually restoring stability to the ankle.

Factors that Influence Healing Time

Several factors can influence how long it takes for an ankle sprain to heal.

Age and overall health play a significant role, with younger individuals and those in good health generally experiencing faster recovery times. Additionally, the severity of the sprain matters; mild sprains may resolve within a couple of weeks, while severe ones may require months of rehabilitation. The chosen treatment approach, such as rest, physical therapy, and bracing, also impacts healing time.

Average Healing Time

So, how long can you expect to be sidelined with an ankle sprain? 

While it varies from person to person and depends on the severity of the injury, here’s a general timeline:

  • Mild sprains: A few days to a couple of weeks
  • Moderate sprains: Several weeks to a couple of months
  • Severe sprains: Several months, with long-term implications for ankle stability

Tips for Speeding Up Recovery

While you’re on the road to recovery, there are steps you can take to help expedite the healing process. 

  • Following a prescribed rehabilitation program, including exercises to strengthen the ankle and improve flexibility, can aid in recovery.
  • A balanced diet rich in nutrients that support tissue repair and reduce inflammation can also play a significant role. 
  • And don’t forget to listen to your body; if something doesn’t feel right or if recovery is slower than expected, don’t hesitate to seek medical advice.

Ankle sprains are more than just a minor inconvenience; they can disrupt daily activities and even impact long-term ankle health. By understanding the healing process and taking proactive steps to support recovery, you can minimize downtime and get back on your feet faster. Remember to be patient with yourself, prioritize self-care, and seek professional guidance if needed. With time and proper care, you’ll be back to full strength and mobility sooner than you think.

Dr. T

Hands around a swollen right ankle

Farewell to Swollen Ankles: A Quick Recovery Guide

If you’re dealing with a sprained ankle, I understand the discomfort and uncertainty you may be feeling. In this blog post, I will walk you through the ins and outs of ankle sprains, explaining why swelling occurs and how long it typically lasts. So take a seat, and let’s begin this journey to recovery together.

Understanding Ankle Sprains and Swelling

An ankle sprain happens when the ligaments surrounding the ankle joint get stretched or torn, often due to a sudden twist or roll. This leads to inflammation and swelling as your body’s way of responding to the injury. Think of it as your body’s natural alarm system, signaling that it’s time to start the healing process. While swelling may be uncomfortable, it’s a crucial step toward getting you back on your feet.

Factors Influencing Swelling Duration

  1. Severity of the Sprain: The extent of your ankle sprain plays a significant role in how long swelling sticks around. Mild sprains may ease up within a few days, while moderate to severe sprains might require a bit more time to fully heal.
  2. Individual Variations: Everyone’s body is different, and factors like age, overall health, and previous injuries can influence your recovery timeline. So, it’s essential to be patient with yourself and listen to what your body needs as you heal.
  3. Treatment Approach: The way you treat your sprained ankle can also affect swelling and recovery time. Following the PEACE & LOVE (Protection, Elevation, Avoid Ice & Anti-Inflammatories, Compression, Education/Elevation, Load, Optimism, Vascularization and Exercise) approach in the initial stages, specifically PEACE, can help keep swelling in check and promote healing. Plus, don’t forget about the importance of rehabilitation exercises tailored to strengthen your ankle and prevent future injuries.

Timeline for Swelling Resolution

While I wish I could give you an exact date for when your swelling will go away, the reality is that every sprained ankle is unique. Generally, mild sprains may say goodbye to swelling within a few days, while moderate sprains could take a couple of weeks. Severe sprains might need several weeks or even months for swelling to completely subside. But remember, you’re not alone in this journey, and your body is working hard to bounce back.

Tips for Managing Swelling During Recovery

During your recovery journey, it’s essential to give your ankle the TLC it deserves. Here are some practical tips to help manage swelling and promote healing:

  • Rest and Elevation: Take it easy and give your ankle the rest it needs. Elevating your ankle above heart level whenever possible can help reduce swelling by allowing fluids to drain away from the area.
  • Compression: Compression wraps are your friends when it comes to tackling swelling. Compression wraps provide support and help reduce swelling.
  • Gradual Return to Activity: As swelling decreases and pain diminishes, gradually reintroduce activities and exercises to strengthen your ankle. Listen to your body and take things slow to avoid overdoing it and risking reinjury.

Dealing with a sprained ankle and persistent swelling can be challenging, but remember that you’re not alone. By understanding the nature of ankle sprains, recognizing factors that influence swelling duration, and following proper self-care techniques, you’re taking important steps toward recovery.

So, stay positive, be patient with yourself, and know that I am here to support you every step of the way. You’ve got this!

Dr. T

The Underrated Exercise in Ankle Rehabilitation: The Heel Raise

Understanding the Heel Raise

The heel raise, also known as the calf raise, is a crucial exercise for both preventing and rehabilitating ankle sprains. This simple yet effective movement provides valuable insights and feedback essential for tailoring treatment strategies.

How to Perform a Heel Raise

Performing a heel raise is straightforward:

  • Double Leg: Stand on both legs and rise up onto your toes, lifting your heels off the ground.
  • Single Leg: Stand on one leg and rise up onto your toes, lifting your heel off the ground.

Variations and Adaptations

There are numerous variations of the heel raise to suit individual needs and goals. A quick search on YouTube will reveal options such as isometric holds, elevated surfaces, weight shifts, eccentric movements, resistance with therabands, toe extensions, ball squeezes, and more.

Avoiding Common Pitfalls

To get the most out of your heel raises and avoid injury, keep these tips in mind:

  • Complete the full range of motion.
  • Avoid bouncing or jerking movements.
  • Do not perform the exercise if you are in pain.
  • Keep your knees slightly bent and avoid arching your back excessively.
  • Avoid wearing running or training shoes with high heels while performing this exercise.

Clinical Value of the Heel Raise

Incorporating the heel raise into clinical practice offers numerous benefits:

  1. Assessment Tool: The heel raise is a valuable assessment tool for evaluating plantarflexion strength. Normative values provide benchmarks for comparison, helping identify strength deficits.
  2. Determining Ankle Instability: Inability to perform a heel raise may indicate mechanical and functional ankle deficits, increasing the risk of injury.
  3. Prevention Intervention: For those with a history of ankle sprains, the heel raise can help prevent future injuries by strengthening the calf muscles.
  4. Post-Injury Rehabilitation: Gradually loading the ankle through heel raises aids in tissue repair and functional recovery after an ankle sprain.
  5. Advanced Rehabilitation: As patients progress, advanced variations of the heel raise can be incorporated into rehabilitation programs, providing versatility and adaptability.

Exploring Advanced Variations

Advanced variations of the heel raise introduce complexity and challenge, beneficial for athletes and those needing advanced functional rehabilitation. These variations include:

  • Increased time under tension
  • Elevated platforms
  • Added resistance
  • Surface variations
  • Multi-planar movements
  • Plyometrics
  • Sport-specific exercises

Unlock the full potential of the heel raise in sports medicine rehabilitation by incorporating advanced variations to strengthen ankle stability and function.

To challenge balance and proprioception:

  • Ensure each leg receives equal attention.
  • Perform on an unstable surface like a balance pad or Bosu ball to engage extra stabilizing muscles.

For added resistance:

  • Use resistance bands or hold dumbbells,
  • Gradually increase weight to build strength and endurance over time,
  • Improve tendon resilience and muscle control with eccentric heel raises (slowly lowering the heels back to the ground) .

To target different aspects of the calf muscle:

  • Point toes inward or outward to engage different muscle fibers.
  • Focus on proper form.
  • Maintain controlled movements to prevent injury and maximize benefits.

Integrating heel raises into a comprehensive rehabilitation program can significantly enhance an athlete’s performance and reduce the risk of future injuries. Consistency and progression are key, so regularly assess and adjust the difficulty of the exercises based on individual progress.

Revolutionizing Ankle Medicine: Introducing the Ottawa Ankle Rules

What are the OARs?

The Ottawa Ankle Rules (OARs) emerge as a pivotal clinical decision tool, introduced in 1992 and formally validated in 1995. In essence, they serve as a guide for determining the necessity of radiographs in individuals with traumatic ankle and foot injuries. Simply put, a positive result from the OARs warrants radiographs to rule out fractures, and conversely. In this blog post, we will explore the importance and use of the OARs, explaining how they streamline diagnosis and assist healthcare professionals such as yourself in decision-making.

The OARs are designed to help healthcare providers identify which patients require X-rays following an ankle or foot injury, ultimately reducing unnecessary imaging and associated costs. By following a structured set of criteria, clinicians can confidently assess the likelihood of a fracture based on the patient’s symptoms and physical examination findings.

Moreover, the implementation of the OARs can lead to more efficient patient care, as it allows for timely identification of fractures that require immediate intervention. By facilitating accurate and prompt diagnosis, these rules contribute to better outcomes for patients while also optimizing resource utilization within healthcare settings.

In the subsequent sections, we will explore why the OARs are needed, what continues to drive radiographs, alternative protocols and provide practical insights for you as the healthcare professional on incorporating this valuable tool into their clinical practice.

Why were/are they needed?

Lateral ankle sprains (LAS) reign as the most prevalent injuries encountered in the Emergency Department (ED), amassing a substantial medical cost of 2 billion annually. Pre-OARs era, a staggering 98% of ankle sprains presented in the ED underwent imaging, with 85% yielding negative results. Particularly in secondary care settings, where financial constraints may impede access to radiographs, the OARs present a cost-effective alternative. By effectively utilizing the OARs and reserving radiographs for positive cases, families can be spared unnecessary expenses and visits to the ED or doctor’s office.

What continues to drive the use of radiographs?

Despite the existence of the OARs, several factors persist in propelling the utilization of radiographs. These include parental concerns, stakeholder expectations, adherence to ED protocols, defensive medicine practices, patient satisfaction surveys, and the overarching fear of litigation. The influence of parental expectations and anxieties cannot be overstated.

Alternative protocols

While alternative protocols such as the tuning fork and Bernese Ankle Rules have been proposed, the Sonographic Ottawa Foot and Ankle Rules (SOFAR) warrant attention. SOFAR introduces the use of ultrasound (US) in cases where the OARs yield positive results. Although this approach offers certain advantages, it is not devoid of limitations, notably increased costs and dependence on operator proficiency. Studies have also indicated the potential for clinically significant fractures to be overlooked.

Missed fractures with OARs

Although the OARs have proven effective, isolated case reports highlight instances of clinically significant fractures being missed. Challenges in these cases include determining whether the OARs were appropriately applied, establishing clear definitions of clinically significant fractures, addressing implementation complexities, and ensuring consistency in application between different assessors.

Interesting fact

The journey of the OARs from inception to validation was not without contention. Despite their introduction in 1992, formal validation did not occur until 1995. Notably, during this period, a separate research study contested the efficacy of the OARs. However, this study encountered criticism for its small sample size and premature publication, as it was conducted prior to the refinement and validation of the OARs.

Practical Insights

Practical insights for you as the healthcare professional on incorporating this valuable tool into your clinical practice include conducting training sessions for all healthcare staff to ensure they are familiar with the OARs and understand how to apply them correctly; develop easy-to-follow protocols and checklists that can be readily accessed in the clinical setting to assist with decision-making; collaborate with other healthcare professionals to share knowledge and experiences, improving the overall implementation of the OARs; and encourage open communication and feedback amongst staff to address any challenges or concerns that may arise during the adoption of these rules.

Additionally, staying up-to-date on recent research and guidelines on ankle injuries can enhance the effectiveness of integrating the OARs into your daily practice. By promoting a culture of ongoing learning and improvement, you can enhance patient care and outcomes in managing ankle injuries.


The OARs remain the cornerstone of clinical practice, serving as a reliable guide in the assessment of ankle and foot injuries. However, it is imperative to complement their use with sound clinical judgment, considering individual patient characteristics and circumstances.

By integrating the OARs with thoughtful clinical assessment, you can enhance the accuracy of diagnosing ankle and foot injuries. This approach not only ensures proper care and treatment for your patients but also promotes a more comprehensive understanding of each unique case. By valuing both evidence-based guidelines and individualized care, you can optimize patient outcomes and deliver high-quality patient care.

Dr. T

Ankle Swelling & Discoloration

Swelling, Edema, Inflammation: The Key Differences After An Ankle Sprain

If you’ve ever experienced discomfort or pain in your ankles, it’s crucial to understand these terms to effectively manage and address any underlying issues. In this blog, we’ll explore the differences between swelling, edema, and inflammation, and provide valuable insights to help you navigate ankle injuries with confidence and clarity.

Ankle Anatomy and Function:

Before we get into the specifics, let’s take a moment to understand the anatomy of the ankle joint. The ankle is a complex structure composed of bones, ligaments, and tendons, all working together to provide stability and support during movement. Ligaments connect bones to bones, while tendons connect muscles to bones, facilitating movement and providing strength to the joint.

Swelling: Causes and Characteristics:

Swelling is a common sign of ankle injuries and occurs when excess fluid accumulates in the affected area. This fluid buildup is typically a result of injury, inflammation, or an underlying medical condition. In the case of ankle injuries such as sprains, swelling is often accompanied by pain, redness, warmth, and a decrease in range of motion. Swelling is the body’s natural response to injury, as it helps to protect the injured area and promote healing.

Edema: Understanding the Accumulation of Fluid:

Edema refers to the abnormal accumulation of fluid in tissues, leading to swelling. Unlike general swelling, which may occur as a result of injury or inflammation, edema can be caused by various factors, including fluid retention, venous insufficiency, or heart failure. Edema may present as pitting or non-pitting swelling, depending on the underlying cause. Pitting edema occurs when pressure applied to the swollen area leaves an indentation, while non-pitting edema does not.

Inflammation: The Body’s Response to Injury:

Inflammation is the body’s natural response to injury or infection, aimed at removing harmful stimuli and promoting tissue repair. The signs of inflammation include swelling, redness, heat, pain, and loss of function. In the case of ankle injuries, such as sprains or fractures, inflammation plays a crucial role in the healing process. It helps to mobilize immune cells to the site of injury, remove damaged tissue, and promote the formation of new tissue.

Differentiating Swelling, Edema, and Inflammation:

While swelling, edema, and inflammation are closely related, they are distinct processes with unique characteristics. Swelling refers to the accumulation of fluid in tissues and is often a result of injury or inflammation. Edema specifically refers to abnormal fluid accumulation and can be caused by various factors, including fluid retention or underlying health conditions. Inflammation is the body’s response to injury or infection and involves a complex cascade of immune responses aimed at promoting tissue repair.

Treatment and Management:

Treatment approaches for swelling, edema, and inflammation vary depending on the underlying cause and severity of symptoms. Initial treatment often involves a combination of PEACE & LOVE to alleviate discomfort. In severe cases or those with persistent symptoms, medical evaluation and imaging studies may be necessary to rule out more significant injuries. Physical therapy and rehabilitation exercises are essential components of recovery, helping to restore strength, flexibility, and function to the affected area.

Prevention Strategies:

Preventing ankle injuries and associated swelling, edema, and inflammation requires a proactive approach. Wearing supportive footwear, maintaining a healthy weight, and avoiding high-impact activities can help reduce the risk of injury. Additionally, practicing proper warm-up and stretching techniques before physical activity can improve flexibility and reduce the risk of sprains and strains. It’s also essential to address underlying health conditions that may contribute to edema, such as venous insufficiency or heart failure.

Understanding the differences between swelling, edema, and inflammation is essential for effectively managing ankle injuries and promoting recovery. By recognizing the symptoms and underlying causes of these conditions, you can take proactive steps to protect your ankles and minimize your risk of injury.

Dr. T

Ankle Calf Stretch Against Wall

Unlock Your Recovery: Essential Stretches for Healing Ankle Sprains

If you’re dealing with the discomfort and frustration of a sprain, you’re not alone. In this blog, we’ll explore the role of stretching in ankle recovery and provide you with some gentle exercises to aid in your healing journey. So, let’s get into it, and discover how these stretches can help you get back on your feet.

Understanding the Role of Stretches in Ankle Recovery

Let’s break it down: when you sprain your ankle, the ligaments around the joint get overstretched or torn, leading to pain, swelling, and difficulty moving the ankle. Incorporating gentle stretches into your routine can work wonders in easing discomfort and promoting healing. These stretches help improve flexibility, strengthen muscles, and increase blood flow to the injured area, all of which are crucial for recovery.

Key Stretches for a Sprained Ankle

Let’s make it easy and practical with these gentle stretching exercises:

  • Calf Stretch: Stand facing a wall, placing your hands on it for support. Step one foot back, keeping it straight, while bending the front knee. Gently lean forward until you feel a stretch in the calf of the back leg. Hold for 15-30 seconds, then switch sides.
  • Plantar Fascia Stretch: Sit comfortably and cross one foot over the opposite knee. Using your hand, gently pull your toes back towards your shin until you feel a stretch along the bottom of your foot. Hold for 15-30 seconds, then switch sides.
  • Ankle Alphabet: Sit in a chair with your feet flat on the floor. Pretend you’re tracing the alphabet with your toes, moving your ankle through its full range of motion. This exercise helps improve mobility and flexibility in the ankle joint.
  • Towel Stretch: Sit on the floor with your legs extended in front of you. Loop a towel around the ball of your foot and gently pull it towards you, keeping your knee straight. Hold for 15-30 seconds, then switch sides.

Tips for Incorporating Stretches into Ankle Recovery

Now that you know the stretches, here are some tips to make the most of your recovery journey:

  • Start Gradually: Begin with gentle stretches and gradually increase intensity as your ankle heals. Listen to your body and avoid pushing through pain.
  • Consistency is Key: Perform stretches regularly to see improvement in ankle mobility and strength. Incorporate stretches into your daily routine to ensure consistency.
  • Combine with Other Therapies: Pair stretches with other therapies such as compression and elevation for comprehensive ankle recovery. Each component works together to support your healing process.

Precautions and Contraindications

Before you get started, here are a few things to keep in mind:

  • Caution Against Overstretching: Avoid overstretching the injured ankle, as this can worsen pain and delay healing. Stick to gentle, controlled movements within your comfort level.
  • Consult a Healthcare Professional: If you have severe ankle sprains or underlying medical conditions, consult with a licensed healthcare professional before starting any new exercise regimen to ensure safety and effectiveness.
  • Modify as Needed: Adapt stretches to your individual comfort level and range of motion. If a stretch causes discomfort or pain, modify or skip that exercise altogether.

Incorporating gentle stretches into your ankle recovery routine can make a significant difference in your healing journey. By nurturing your ankle with these simple exercises, you’re giving it the support it needs to bounce back stronger than ever. Always keep in mind that your health and well-being come first, and I am here to support you every step of the way. Keep up the good work, stay positive, and trust in your body’s ability to heal.

You’ve got this!

Dr. T